If you have a requirement for 1 PIH-931D keyboard to control multiple NVR’s that do not have a keyboard in and out port on the rear of the unit, follow the short guide below.
1) Link the keyboard using the ‘Keyboard In’ port on the rear of the first NVR using a single Cat5 cable. The keyboard will receive power via PoE from the NVR.
2) Enter each NVR menu and make a note of the IP address, username and password for each device. Next enter the NVR menu and select ‘System’ on each NVR.
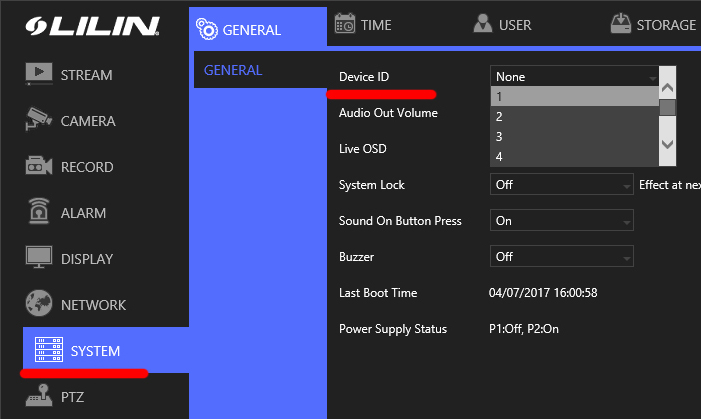
3) Under the ‘System’ menu you will see an option labelled ‘Device ID’. Select a unique number for each NVR. Please ensure the ID of the NVR with the keyboard attached is set to number 1.
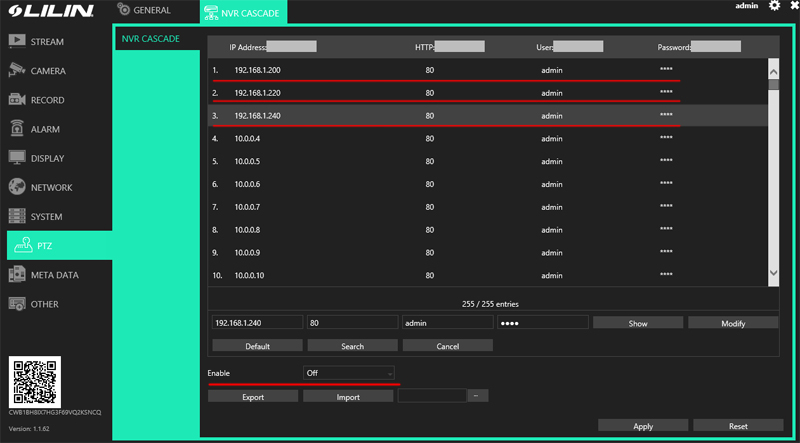
4) On the NVR with the keyboard connected, enter the NVR menu. Go to ‘PTZ’ and then ‘NVR Cascade’ from the menu across the top of the screen.
5) In here, enter the IP address, username and password of the NVR’s that the ID’s have been set on.
The number of the left 1. 2. Etc are the device ID’s set in each NVR menu. Please add the correct IP, username and password to all the relevant columns.
This should now allow the keyboard to control all the NVR’s that have had an ID set and the correct information added in to the cascade table on the first NVR.
6) Towards to bottom of the NVR Cascade screen is an option labelled 'Enable' please ensure this is set to 'On'.

To control each NVR from the keyboard, select the following:
<NVR ID Number> then <Cam Number> I.E 1 DVR, 2 Cam
This should now display camera number 2 in full screen on the monitor connected to NVR 1.
If you were to type on the keyboard
3 DVR 10 Cam
This will now display camera number 10 on NVR 3 in full screen.
To switch back to a multi-way display, select E.G 1 DVR then the required multi-way button, this should set the monitor to display the pattern selected.
0 Comments